linux poison RSS
linux poison Email
0

Finally, Media Center that works on openSuSe

I tried elisa, freevo and few more in same category and none of them works straight after installation and finally tried XBMC which works like charm on OpenSuSe 11.1

XBMC, recursive acronym for “XBMC Media Center“, is an award winning free and open source software media-player and entertainment hub for all your digital media.

XBMC is a cross-platform software available for Linux, Mac OS X (Leopard, Tiger, and Apple TV), Microsoft Windows operating-system, as well as the original Xbox game-console. With translations to over 30 languages for a worldwide audience.

Superb Format and Codec support
XBMC supports a very complete spectrum of of audio and video multimedia file formats and codecs right out-of-the-box, and include features such as playlist playback, audio visualizations, picture viewing, slideshows, and weather forecast functions, RSS feed scroller on your home screen, together with a ever expanding array of community driven third-party add-ons and plugins.

Endless playback capabilities for All Types of Media
XBMC can play most audio and video file formats as well as display images at resolutions up to 1080p FullHD and over with no software limitation from virtually any source, including your local harddrive, CD/DVDs, USB flash drives, the Internet, and network shares, upscaling any lower resolutions videos to the maximum of your displays capability. XBMC can also playback DVD-Video movies with menus from ISO/IMG-images on-the-fly, even when they are in an RAR or ZIP archive. For music playback XBMC offers ReplayGain, gapless, crossfading, cue sheet, and pre-amplification playback option, as well as advanced smart playlists, and chapter support.

XBMC can download or stream Internet video and audio streams, and play Internet radio stations (such as Podcasts and SHOUTcast), and listen to your favorites and discover new music with free, streaming music from Last.fm, among others.

XBMC of course handles all common digital picture formats with the options of panning/zooming, and slideshow with “Ken Burns Effect“. XBMC also handles CBZ and CBR comic book archive files, this feature lets you view/read, browse and zoom the pictures of comics pages these contain without uncompressing them first.

Album and Cover Art
XBMC takes full advantage of Internet connection if available, Artwork is automatically fetched for posters, artwork, fanart, synopsis and reviews on movies, plot, cast and episode information for TV shows, also album covers and artist information for music.

Installation on Ubuntu intrepid:
Add these third party repositories:

deb http://ppa.launchpad.net/team-xbmc-intrepid/ubuntu intrepid main
deb-src http://ppa.launchpad.net/team-xbmc-intrepid/ubuntu intrepid main

Install:
sudo apt-get update
sudo apt-get install xbmc


Installation on OpenSuse- Use "1-click" installer to install XBMC

openSUSE 11.1 - here
openSUSE 11.0 - here


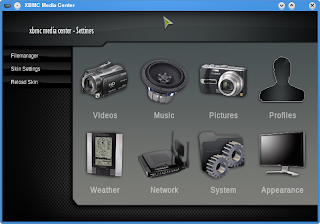
After successfully installation, go to console and fire command: xbmc and you should see a beautifull XBMC welcome screen.
 
1)  Now you can add your music/video/picture collection ...

2) And for more tweak and settings ..

Read more
4

How to Check and repair mysql tables

mysqlcheck is the command line program to check and repair mysql tables.
It performs the same functions as the check table and repair table query statements.
 
Examples:
# mysqlcheck bugs
This checks all of the tables in the bugs database.

# mysqlcheck bugs flags groups
This checks the flags and groups tables in the the bugs database

Using the –repair option you can repair tables using the same syntax as above.

Options to mysqlcheck to just check a table are:
   
–check-only-changed     Same as “check table changed” query
–extended     Same as “check table extended” query
–fast     Same as “check table fast” query
–medium-check     Same as “check table medium” query
–quick     Same as “check table quick” query

Options to mysqlcheck to repair a table are:
   
–repair     Same as “repair table” query
–repair –extended     Same as “repair table extended” query
–repair –quick     Same as “repair table quick” query
–repair –use-frm     Same as “repair table use_frm” query
Read more
2

Web content filtering with DansGuardian

DansGuardian provides web filtering capability, similar to NetNanny. It is useful for limitng objectionable content in publicly accessible workstations, or for filtering objectionable content for younger users. It integrates with ClamAV, and uses several criteria for filtering websites. It can be used with Tinyproxy (best for individual users) or the Squid proxy (best for a network server).

DansGuardian features:
    * Built-in content scanner plugin system which includes AV scanning.
    * NTLM and persistent connection support.
    * Header analysis and manipulation so you can manipulate cookies
    * Large file (2GB+) download & scanning support
    * Autotools build system
    * URL regular expression replacement so you can force safe search in Google
    * Deep URL scanning to spot URLs in URLs to for example block images in Google images
    * Advanced advert blocking
    * Many performance improvements
    * Updates to handle all current web technology trends
    * Blanket SSL blocking so you can block SSL anonymous proxies and allow access to legitimate SSL sites such as banking by whitelisting

Installation on Ubuntu Interpid:
sudo apt-get install dansguardian tinyproxy
or
sudo apt-get install dansguardian squid

See these installation instructions for setup details. In brief,

Edit the dansguardian configuration file:sudo vi /etc/dansguardian/dansguardian.conf
comment out the UNCONFIGURED line:
#UNCONFIGURED

If using tinyproxy instead of Squid, change the proxyport to 8888:
proxyport 8888

Set your browser to use the localhost:8080 proxy. For example, in Firefox:
Firefox -> Edit -> Preferences -> Advanced -> Network -> Settings
Manual proxy configuration -> HTTP proxy: localhost -> Port: 8080
Read more
0

Keep control of computer usage - Parental controls

timekpr will track and control the computer usage of your user accounts. You can limit their daily usage based on a timed access duration and configure periods of day when they can or cannot log in. With this application, administrators can limit account login time duration or account access hours.


Installation on intrepid:
If updating, remove any prior versions: sudo dpkg --purge timekpr
Add the timekpr third-party repositories:

deb http://ppa.launchpad.net/nedberg/ubuntu intrepid main
deb-src http://ppa.launchpad.net/nedberg/ubuntu intrepid main

Install: sudo apt-get install timekpr
When prompted which default display manager to use, select "kdm"
Start: System -> Administration -> Timekpr Control Panel

Read more
1

How to Convert .cue and .bin files into an .iso file

bchunk converts a CD image in a ".bin / .cue" format (sometimes ".raw / .cue") to a set of .iso and .cdr tracks. The bin/cue format is used by some non-Unix cd-writing software, but is not supported on most other cd-writing programs.

image.bin is the raw cd image file. image.cue is the track index file containing track types and offsets. basename is used for the beginning part of the created track files.

The produced .iso track contains an ISO file system, which can be mounted through a loop device on Linux systems, or written on a CD-R using cdrecord. The .cdr tracks are in the native CD audio format. They can be either written on a CD-R using cdrecord -audio, or converted to WAV (or any other sound format for that matter) using sox.

Installation on Ubuntu Intrepid: sudo apt-get install bchunk

To convert .cue and .bin files, navigate to the folder and run this command (replacing filenames with your own):
bchunk inputfilename.bin inputfilename.cue outputfilename.iso

After the file is converted into ISO you can mount it using: sudo mount -o loop outputfilename.iso /media/output
Navigate to /media/output and you should see all the content there. You can then copy it anywhere.
To unmount: sudo umount /media/output


Installation on OpenSuse: OpenSuse user can use "1-click" installer to install bchunk
OpenSuSe 11.1 - here
OpenSuSe 11.0 - here
Read more
0

Install all different kinds of browsers on Ununtu

Mozilla Firefox
Mozilla Firefox is the ubiquitous web browser. Based on open source components, it is trademarked and cannot be altered or re-distributed with any change that involves the name or trademarks. Install the current version: sudo apt-get install firefox

IceCat
GNU IceCat, formerly known as GNU IceWeasel, is a web browser distributed by the GNU Project. IceCat, which is made entirely of free software, is a fork of Mozilla Firefox. It is compatible with the GNU/Linux operating system. Install the current version: sudo apt-get install iceape-browser

SeaMonkey
The SeaMonkey project is a community effort to develop the SeaMonkey all-in-one internet application suite (see below). Such a software suite was previously made popular by Netscape and Mozilla, and the SeaMonkey project continues to develop and deliver high-quality updates to this concept. Containing an Internet browser, email & newsgroup client, HTML editor, IRC chat and web development tools, SeaMonkey is sure to appeal to advanced users, web developers and corporate users. Install the current version: sudo apt-get install seamonkey

IceApe
IceApe is an open source Internet suite, based upon the defunct Mozilla Suite (now itself folded into the  SeaMonkey suite).Anyone familiar with Gecko-based Internet suites, such as the original Netscape browser/suite or Mozilla's, will feel comfortable with IceApe's interface and contents. Install the current version: sudo apt-get install iceape

Opera
Opera is a proprietary browser and internet suite (currently free on PCs) also used in some mobile devices and gaming consoles. It includes email, an address book, IRC chat, integrated BitTorrent, and webfeeds. A limited number of plugins are also available: sudo apt-get install opera

Read more
0

How to use Aptitude on Ununtu

Aptitude is a terminal-based package manager that can be used instead of apt-get. Aptitude marks packages that are automatically installed and removes them when no packages depend on them. This makes it easy to remove applications completely. To use Aptitude, replace apt-get with aptitude in the command line. Example:

sudo aptitude install packagename
sudo aptitude remove packagename
sudo aptitude update
sudo aptitude upgrade

For an ncurses-based graphical user interface, type sudo aptitude
For more information, see the aptitude documentation.
Read more
0

How to install a Ubuntu package from source code

Make sure you have all the necessary development tools (i.e. libraries, compilers, headers):

sudo apt-get install build-essential
sudo apt-get install linux-headers-`uname -r`

Note: "uname -r" lists the current kernel you are using

Extract the archive that contains the source files: tar xvf sourcefilesarchive.tar.gz

Build the package using the package's script (in this case the configure script), compile the package (make), and install the compiled package into your system (make install):

cd /path/to/extracted/sourcefiles
./configure
sudo make
sudo make install

If you get a "permission denied" error when trying to execute the binary, this means that the file is not marked as being executable. To fix this: sudo chmod +x filename
Read more
1

Spam Filtering using Procmail & SpamAssassin

When Procmail is used in conjunction with SpamAssassin. When used together, these two applications can quickly identify spam emails, and sort or destroy them.

SpamAssassin uses header analysis, text analysis, blacklists, a spam-tracking database, and self-learning Bayesian spam analysis to quickly and accurately identify and tag spam.

The easiest way for a local user to use SpamAssassin is to place the following line near the top of the ~/.procmailrc file:

INCLUDERC=/etc/mail/spamassassin/spamassassin-default.rc

The /etc/mail/spamassassin/spamassassin-default.rc contains a simple Procmail rule that activates SpamAssassin for all incoming email. If an email is determined to be spam, it is tagged in the header as such and the title is prepended with the following pattern:

*****SPAM*****

Since SpamAssassin is a Perl script, it may be necessary on busy servers to use the binary SpamAssassin daemon (spamd) and client application (spamc). To start the spamd daemon, type the following command as root: /sbin/service spamassassin start and make sure the spamassassin is set to autostart at booting time
        
To configure Procmail to use the SpamAssassin client application instead of the Perl script, place the following line near the top of the ~/.procmailrc file. For a system-wide configuration, place it in /etc/procmailrc:

INCLUDERC=/etc/mail/spamassassin/spamassassin-spamc.rc
Read more
3

How to configure DHCP Client

To configure a DHCP client manually, modify the /etc/sysconfig/network file to enable networking and the configuration file for each network device in the /etc/sysconfig/network-scripts directory. In this directory, each device should have a configuration file named ifcfg-eth0, where eth0 is the network device name.

The /etc/sysconfig/network file should contain the following line:

NETWORKING=yes

The /etc/sysconfig/network-scripts/ifcfg-eth0 file should contain the following lines:

DEVICE=eth0
BOOTPROTO=dhcp
ONBOOT=yes

A configuration file is needed for each device to be configured to use DHCP.

Other options
PEERDNS=, where is one of the following:
yes — Modify /etc/resolv.conf with information from the server. If using DHCP, then yes is the default.
no — Do not modify /etc/resolv.conf.

USERCTL=, where is one of the following:
yes — Non-root users are allowed to control this device.
no — Non-root users are not allowed to control this device.
Read more
0

How to verify that a package (rpm) has not been corrupted or tampered

If you wish to verify that a package has not been corrupted or tampered with, examine only the md5sum by typing the following command at a shell prompt (where is the file name of the RPM package):

rpm -K --nosignature

e.g) # rpm -K --nosignature amarok-1.4.10-26.1.i586.rpm
amarok-1.4.10-26.1.i586.rpm: sha1 md5 OK


The message : md5 OK is displayed. This brief message means that the file was not corrupted by the download. To see a more verbose message, replace -K with -Kvv in the command.

# rpm -Kvv --nosignature amarok-1.4.10-26.1.i586.rpm               
D: Expected size:      3243261 = lead(96)+sigs(772)+pad(4)+data(3242389)
D:   Actual size:      3243261
amarok-1.4.10-26.1.i586.rpm:
    Header SHA1 digest: OK (36ec55a4b71ed8f444961591529356d91c7301a8)
    MD5 digest: OK (2f02fb879d6a4968f4cc3d403d0d0e2d)
D: May free Score board((nil))
Read more
1

Smart Home with LinuxMCE

LinuxMCE is a free, open source add-on to Kubuntu including a 10' UI, complete whole-house media solution with pvr + distributed media, and the most advanced smarthome solution available. It is stable, easy to use, and requires no knowledge of Linux and only basic computer skills.

Features:

Smart Home
• Home Automation: Control lighting, climate, security, camera surveillance, and more
• Communication: Phone system with auto-attendant, voice mail, call forwarding/routing for VOIP and POTS lines
• Security: Uses your existing home alarm, surveillance cameras, lights, phones and tv's to notify you on your mobile phone of any security alerts with the option of reseting the alarm or broadcasting your voice in the house over the tv's

Media & Entertainment
• 3D alpha-blended GUI optimized for displaying on a TV and using a remote control
• Media browser presenting all content on all devices in the home on a 3D rotating cube
• Plug-and-play detection and aggregation of network storage and DMA's
• Built-in NAS providing centralized backup and whole-house media server
• "Follow Me" Media, each family member's media follows him/her through the house
• Automatically controls all existing av devices, like TV's, Stereo's, etc.)
• Many control options: mobile phone, webpad, pda, phone

Check here for dowload instructions - here
Check here for screenshots and video demo.
Read more
0

Upgrade to KDE 4.2.1

March 4th, 2009. The KDE Community announced the immediate availability of "Cream", (a.k.a KDE 4.2.1), another bugfix and maintenance update for the latest generation of the most advanced and powerful free desktop. Cream is a monthly update to KDE 4.2. It ships with desktop workspace and many cross-platform applications such as administration programs, network tools, educational applications, utilities, multimedia software, games, artwork, web development tools and more. KDE's award-winning tools and applications are available in more than 50 languages.


Installation/Upgrade

Fedora KDE 4.2.1 packages are available:

    * Fedora 10
    * Fedora 9

Kubuntu packages are included in the upcoming "Jaunty" (9.04) and also made available as updates for the stable 8.10 ("Intrepid"). More details can be found in the announcement on Kubuntu.org.

Mandriva provide packages for 2009.0 i586 2009.0 x86_64
Please refer to README to more information and how to install debug packages to provide upstream developers proper information in case you desire help KDE improving. For Mandriva Cooker ( development ) users, 4.2.1 is fully available at cooker repositories.

openSUSE packages are available for openSUSE 11.1 (one-click install), for openSUSE 11.0 (one-click install) and for openSUSE 10.3 (one-click install). A KDE Four Live CD with these packages is also available.

KDE is a very large project and depends on people volunteering time, code, money, and energy to keep it going. If you are interested in supporting KDE in any way, please read the Supporting KDE page.

KDE is available for free and will always be available for free, including each and every line of its source code for everyone to modify and distribute. If you enjoy and use KDE please consider supporting the KDE Project financially. KDE is in constant need of funds in order to finance its operations.
Read more
1

What is Btrfs?

Btrfs (B-tree FS or "Butter FS") is a new copy on write filesystem for Linux aimed at implementing advanced features while focusing on fault tolerance, repair and easy administration. Initially developed by Oracle, Btrfs is licensed under the GPL and open for contribution from anyone.

Linux has a wealth of filesystems to choose from, but we are facing a number of challenges with scaling to the large storage subsystems that are becoming common in today's data centers. Filesystems need to scale in their ability to address and manage large storage, and also in their ability to detect, repair and tolerate errors in the data stored on disk.

The main Btrfs features include:
  * Extent based file storage (2^64 max file size)
  * Space efficient packing of small files
  * Space efficient indexed directories
  * Dynamic inode allocation
  * Writable snapshots
  * Subvolumes (separate internal filesystem roots)
  * Object level mirroring and striping
  * Checksums on data and metadata (multiple algorithms available)
  * Compression
  * Integrated multiple device support, with several raid algorithms
  * Online filesystem check
  * Very fast offline filesystem check
  * Efficient incremental backup and FS mirroring
  * Online filesystem defragmentation

Read here for Btrfs Performance Analysis
Read more
5

How to recover deleted pictures and Video files

PhotoRec is file data recovery software designed to recover lost files including video, documents and archives from Hard Disks and CDRom and lost pictures (thus, its 'Photo Recovery' name) from digital camera memory. PhotoRec ignores the filesystem and goes after the underlying data, so it will still work even if your media's filesystem has been severely damaged or re-formatted.

PhotoRec is free, this open source multi-platform application is distributed under GNU Public License. PhotoRec is a companion program to TestDisk, an app for recovering lost partitions on a wide variety of filesystems and making non-bootable disks bootable again.

For more safety, PhotoRec uses read-only access to handle the drive or memory support you are about to recover lost data from. Important: As soon as a pic or file is accidentally deleted, or you discover any missing, do NOT save any more pics or files to that memory device or hard disk drive; otherwise you may overwrite your lost data. This means that even using PhotoRec, you must not choose to write the recovered files to the same partition they were stored on.

PhotoRec searches for known file headers. If there is no data fragmentation, which is often the case, it can recover the whole file. Photorec recognises numerous file format including ZIP, Office, PDF, HTML, JPEG and various graphics file formats. The whole  list of file formats recovered by PhotoRec contains more than 180 file extensions (about 100 file famillies).

Installation:
OpenSuse 11.1 user can use "1-click" installer to install PhtoRec - here

After sucessfull installation go to terminall and fire command: PhtoRec to open the PhtoRec console, you need to be "root" to use PhtoRec

Below are the few screen shots on how to use and recover files using PhtoRec, it's an menu driven and see to figure out the options

1) The first screen when you execute the PhtoRec


 2) Here is the screen shorts of PhtoRec while recovering the deleted files from the specified partition and copying the files back to a configured directory

 
Refer here for more details and options to use photoRec 


Read more
2

How to recover/repair lost/damage partitions - OpenSuse

TestDisk is a powerful free data recovery software! It was primarily designed to help recover lost partitions and/or make non-booting disks bootable again when these symptoms are caused by faulty software, certain types of viruses or human error (such as accidentally deleting a Partition Table). Partition table recovery using TestDisk is really easy.

 
TestDisk can:
    * Fix partition table, recover deleted partition
    * Recover FAT32 boot sector from its backup
    * Rebuild FAT12/FAT16/FAT32 boot sector
    * Fix FAT tables
    * Rebuild NTFS boot sector
    * Recover NTFS boot sector from its backup
    * Fix MFT using MFT mirror
    * Locate ext2/ext3 Backup SuperBlock
    * Undelete files from FAT, NTFS and ext2 filesystem
    * Copy files from deleted FAT, NTFS and ext2/ext3 partitions.

TestDisk has features for both novices and experts. For those who know little or nothing about data recovery techniques, TestDisk can be used to collect detailed information about a non-booting drive which can then be sent to a tech for further analysis. Those more familiar with such procedures should find TestDisk a handy tool in performing onsite recovery.

Installation:
OpenSuse 11.1 user can use "1-click" installer to install testdesk  - here
After sucessfull installation go to terminall and fire command: testdesk to open the testdesk console, you need to be "root" to use deskdesk

Below are the few screen shots on how to use teskdesk, it's an menu driven and see to figure out the options

1) The first screen when you execute the testdesk 


2) Here is the screen shorts after teskdest done with the analyzing the disk partition structure for any kind of errors 


Refer here for more details and options to use deskdesk
Read more
0

Subversion repositories configuration on OpenSuse

Userfriendly SVN is a PHP5 web interface which permit to administrate and to configure Subversion repositories.

It allows users to create and manage projects without command line SVN client. USVN manages your projects for you, and allows users to checkout source code only if they are allowed to. Dispatch administrators on different projects become easy and safe.

During the installation process, USVN shows you an apache configuration bloc. After merging it with your apache configuration file, you don't need further root access.

USVN enable an easy, fast and powerful repositories files access configuration. For example translators may only have translation files access.

Installation:

OpenSuse 11.1 user can use "1-click" install to install USVN - here
After sucessfull installation go to >> http://localhost/usvn and you should see the first welcome screen


2) Click on "next" and on the 4th page you can configure the path of SVN repositories

 3) Click on "next" to configure the database section (MySQL)

 
4) After successful configuration of all the section you can now login to the USVN, go to administration section can add users, groups and projects, the interface is very simple to figure all these out.
Read more
7

MP3 to iPod Audio Book Converter

Zak allows you to select one or more MP3 files and convert them into a single MP3 or MP4/M4A/M4B file. The primary use for Zak is audio books. Most audio books are distributed in several files, usually one per chapter. Converting these files into a single .m4b allows one to take advantage of the iPod's bookmarking features.

Zak is written in python using the pygtk module. Zak is designed for GNU/Linux, but it is likely possible to get it to work on other systems without too much trouble.

Requires: python, pygtk, gtk+, madplay, and ffmpeg.

Note: This program was inspired by the Windows program "MP3 to iPod Audio Book Converter" available from http://www.freeipodsoftware.com/

OpenSuse 11.1 user can use "1-click" installer -- here


For any other GNU/Linux distro download zak-0.3.tar.gz.
To install, perform the following steps...
Requirments
Make sure your system has all these requirements installed:madplay, ffmpeg, python, pygtk2, vte, gstreamer, gstreamer-python
1. Locate your download and unpack it: tar xzf zak-0.3.tar.gz
2. cd into the unarchived directory: cd zak-0.3/
3. Use sudo (or root) to run the install: sudo python setup.py install 

You should now be able to run zak from the command line
Read more
0

How to Compress Javascript

First, you can try to make the javascript file smaller itself. There are lots of utilities to “crunch” your files by
removing whitespace and comments.

You can do this, but these tools can be finnicky and may make unwanted changes if your code isn’t formatted
properly. Here’s what you can do:

1. Run JSLint (online or downloadable version) to analyze your code and make sure it is well-formatted.

2. Use Rhino to compress your javascript. There are some online packers, but Rhino actually analyzes your source
code so it has a low chance of changing it as it compresses, and it is scriptable.

Install Rhino (it requires Java), then run it from the command-line:

java -jar custom_rhino.jar -c myfile.js > myfile.js.packed 2>&1
 
This compresses myfile.js and spits it out into myfile.js.packed. Rhino will remove spaces, comments and shorten
variable names where appropriate. The “2>&1″ part means “redirect standard error to the same location as the
output”, so you’ll see any error messages inside the packed file itself (cool, eh? Learn more here.).
Read more
4

“Powered by Ubuntu” stickers!

System 76 is giving away some “Powered by Ubuntu” stickers to people who send self-addressed stamped envelopes to them. These are where you could send your envelopes to:

India
Baishampayan Ghose
214/4, Sher-e-Punjab Society
Andheri (E), Mumbai --- 93
India

United Kingdom
The Linux Emporium
Bridge House
17a Maybrook Road
Sutton Coldfield
Birmingham
B76 1AL UK

United States
System76, Inc. (Free Sticker)
1582 S. Parker Rd. Ste. 310
Denver, Colorado 80231

It is best to paste these stickers on your system and let other know that you are "Powered by Ubuntu"
I have send my own envelope to "india" location and let see when these stickers are comming to me.

Thanks to the guys at System 76  for supporting the Ubuntu community  with these stickers.
Click here for a list of Ubuntu sticker suppliers in other countries.
Read more
1

All in one Peer-to-Peer File-Sharing Program for OpenSuse

Apollon is a Peer-to-Peer File-Sharing Program written for Linux.

Apollon uses the giFT core to connect to various networks, including OpenFT, Gnutella, FastTrack

OpenFT is the homegrown giFT network, Gnutella is the network used by BearShare, LimeWire and others and FastTrack is the popular network used by KaZaA.

Apollon uses a plugin system which allows you to choose which network or multiple networks you wish to use. Finally, plugins for the OpenNap and SoulSeek networks are under development.

Features:
  * Searching and downloading from several networks at the same time
  * Tabbed searching
  * Preview of mp3 and videos (you need kde-multimedia installed)
  * Configure giFT and your plugins with Apollon's settings dialog
  * FirstRun wizard to get started easily
  * systemtray docking
  * Download in the background
  * Apollon can connect to a remote giFT daemon
  * Chat for Apollon users
  * Comes in several languages

Installation:
Opensuse 11.1 user can use "1-click" installer - here

 
After successful installation go to terminal and fire command: apollon or open from the kde menu- Application >> Internet >> Peer-to-Peer >> apollon
 
Read more
0

File Integrity Checker for OpenSuse - AFICK

Afick is a security tool, very close from the well known tripwire. It allows to monitor the changes on your files systems, and so can detect intrusions. It only needs standard perl to work.

It will be run daily by cron to detect new/deleted/modified files. It works by first (init) making an snapshot of strategic directories attributes, and then compare the disk status with this snapshot.
A Graphical interface is available in afick-gui package.

Afick is now composed of different parts (packages) :

    * afick : the base, command-line tool
    * afick-gui : a graphical interface (in perl/Tk)
    * rtafick : a "real-time" afick : which will run as a service/daemon : it is in very early stage

Installation:
Use "1-click" installer to install all the above component from packman - here  or if you are already subscribe to "packman" you can go the yast >> software management and search for package "afick", after getting the results select the packages and "accept" to install it.


After sucessfull installation you can open up the aflick-tk (GUI tool) for configuration


After  installation of any new software you can run the "compare" mode to see what all changes was done in the system files


You can also use the command line option to work with aflick

Initiate your base: afick.pl -c /etc/afick.conf -i
Compare it regularly: use the compare (-k) or update (-u) command
afick.pl -c /etc/afick.conf -k
afick.pl -c /etc/afick.conf -u

Update it manually after any change: To know exactly what an install does :
   1. run afick in update mode
   2. install/upgrade/remove your software
   3. re-run afick in update mode

Look at the man pages for more details
Read more
0

A downloader for Rapidshare and other file share archives

FreeRapid is a simple Java downloader for Rapidshare and other file share archives. It has support for concurrent dwnloading from multiple services, and is able to use a proxy list.

Main Features
    * support for concurrent downloading from multiple services
    * downloading using proxy list
    * download history
    * smart clipboard monitoring
    * automatic checking for file's existence on server
    * auto shutdown options
    * automatic plugins updates
    * simple CAPTCHA recognition
    * works on MS Windows, Linux and MacOS

Installation:
OpenSuse 11.1 user can use "1-click" installer - here

 
After sucessfull installation you can run the freerapid from the menu or from the command line
Read more
0

Analyzing boot performance of OpenSuse 11.1 with bootchart

Often the boot process of a machine is not as fast as one would like. It is commonly suggested that you reduce the number of started services so that your machine boots up faster. However, one thing we must know before trying to optimize our boot process, is where it is slow. To do that, we will use a tool called bootchart.

Bootchart is a tool for performance analysis and visualization of the GNU/Linux boot process. Resource utilization data and process information are collected during the boot process, and can later be displayed in a PNG, SVG, or EPS encoded chart. Analyzing the chart will help in finding opportunities for optimization.

The first thing we must do is, obviously, install the package, open yast -- software managment and search for "bootchart" and click on "Accept" to install bootchart


Bootchart provides a shell script to be run by the kernel in the init phase. The script will run in background and collect process information, CPU statistics and disk usage statistics from the /proc file system. The performance data are stored in memory and are written to disk once the boot process completes.

The boot log file is later processed using a Java application (or the web form) which builds the process tree and renders a performance chart in different formats.

Configuration:
Bootchartd mounts a tmpfs below /tmp, so make sure you don't clear this at boot time, otherwise you will have invalid data.

Especially check the setting of: CLEAR_TMP_DIRS_AT_BOOTUP in sysconfig/cron

Reboot your system and after reboot you will find two files (bootchart.tgz and bootchart.png) under /var/log directory and this png file will give you detail view of the time that a particular process has taken while booting so that you can look into it and can optimize it for faster booting.
Read more
1

301 Redirects using apache

301 redirect is the safest search engine redirect. This is also the friendliest method for web page redirection. Most web hosting company and web master out there will definitely recommend this method of web page redirection. The code “301 is interpreted as “moved permanently”.

For websites hosted in either dedicated server or a shared web hosting server, you use 301 redirects in redirecting a single html page or an entire website.

Here’s and example of redirecting a single page/html page:
Redirect 301 /oldpage.html http://www.example.com/newpage.html
For a whole website, you can use 301 redirect in this manner:
Redirect 301 / http://www.example.com/
There are other use of the 301 redirect on a web sites. Here are other use of it:

Changed file extension
Redirect web site with ‘www’ to not having one.
vice versa of the previous example.
Redirect example.com/index.php to example.com/

So next time you moved your web site content from one web hosting server provider to another or moving your site to a new domain name, you can definitely use the 301 redirect.

This is simple configuration you can make it into your Apache configuration file.

[ref: http://www.sysadmindayph.com/blog/301-redirects-htaccess/]
Read more
0

Create, Format, Resize/Move, Copy or Delete partitions - OpenSuse

The Disk Manager is a visual partitioning utility, written on top of GNU parted, that can create, format, resize/move, copy or delete partitions, with 13 known filesystems.

The application interface is in the style of QtParted or GParted, but, is very modular, and, as part of DARKSTAR's ALICE (Advanced Linux Installation and Configuration Environment), is used by the installer for partitioning objectives.

It is capable, of running from a console, even though it is written entirely in KDE/Qt.

It requires OpenSuSE's hwinfo, parted and HAL/DBus support, and is part of the DARKSTAR Linux Project.

Installation:
Use "1 click" installer to install Disk Manager - here


After sucessfull installation, go to teminal and fire command: diskman

Read more
65

9 features Ubuntu should implement


This post came from this  (in Spanish), ran it through Google Translate, and posted it on his blog and it looks like this Spanish translation came from this  (in English) and claimed it had ten features.  Anyway, The original one is kumailht


Ubuntu is a great operating system, but a small modification and adding here and there will make the ubuntu desktop a  enjoyable experience. These include:
1. Weather on your desktop
Time is very important to us. For example, an application like atmosphere, we can show or hide with a simple button and allows us to obtain weather forecasts and know the temperature of different locations we select.
atmosphere22-2-1
2. Wallpapers which change over time
It is a kind of idea of having kind of wallpapers from photos taken of different environments or at different times and showing one or the other.
timewallpaper
Read more .. here 
Read more
0

The privacy and disk space cleaner - BleachBit

BleachBit deletes unnecessary files to free valuable disk space, maintain privacy, and remove junk. Rid your system of old clutter including cache, cookies, Internet history, localizations, logs, temporary files, and broken shortcuts.

Designed for Linux systems, it wipes clean Adobe Reader, APT, Bash, Beagle, Chromium, Epiphany, Firefox, Flash, GIMP, Google Earth, Java, KDE, OpenOffice.org, Opera, RealPlayer, Second Life viewer, Skype, VIM, XChat, Yum, and more.

Installation:
OpenSuse 11.1 user can use "1-click" installer to install BleachBit -- here


Fedora 10 user can install it using rpm - here
Ubuntu 8.10 (Intrepid Ibex) - here
Ubuntu 9.04 (Jaunty Jackalope) - here

Source code - here, compile and install it using following command ...
tar xvjf bleachbit-0.4.0.tar.bz2
cd bleachbit-0.4.0
make -C po local
python bleachbit/GUI.py
After sucessfull installation go to terminal and fire command: bleachbit

 
Read more
0

Which Linux Distribution to Choose?

Linux Distribution Chooser is an on line application where you have to answer series of questions, these sets also includes questions on your knowledge on Linux and type of OS you are look for and depending on your answers the application will gives you a list of recommendations on the Linux distributions that best suits your needs.


Do check this out, it's really useful.
Read more
0

Finding differences in two files with TkDiff

tkdiff is a graphical front end to the diff program. It provides a side-by-side view of the differences between two files, along with several innovative features such as diff bookmarks and a graphical map of differences for quick navigation.

Installation OpenSuse 
Goto yast >> Software management and search for package "TkDiff", select the package and install it using yast

 
After successful installation you can goto console and use command: tkdiff to open the mail window

You can also use the tool from command like using commands ..

* tkdiff to compare two files. 
 * tkdiff -conflict to merge a file with conflict markers generated by "merge" or "cvs", The file is split into two temporary files which you can then merge as usual.
 * tkdiff to compare with the most recent version checked into CVS/SCCS/RCS (checked for in that order).
 * tkdiff -r to compare with the most recent version checked in.
 * tkdiff -r to compare with revision of .
 * tkdiff -r -r to compare revision of with the most recent version checked in.
 * tkdiff -r -r to compare revisions and of .
Read more
0

Convert audio files with Gnormalize

gnormalize is an audio converter and CD ripper with ReplayGain normalization algorithms, a metadata (tag) editor and an audio player

gnormalize decodes the MP3/MP4/MPC/OGG/APE/FLAC file to WAV, then normalizes the WAV to a targeted volume level and re-encodes it. Moreover, gnormalize can extract Audio CD track and output as various popular audio formats (MP3, MP4, MPC, OGG, APE, FLAC, WAV) with fast speed and high quality.

gnormalize can also convert audio format between MP3, MP4, MPC, OGG, APE and FLAC with high fidelity, which meets your need to play and collect audio files. It can change the encoding and Metadata (tag) properties of final normalized files.

Input: Supported files format: MP3, MP4 (M4A or AAC), MPC (MPP or MP+ - Musepack), OGG, APE (Monkey's Audio), FLAC, Audio CD and WAV.

Output: Supported files format: MP3, MP4, MPC, OGG, APE, FLAC and WAV.

Feature:
 * Convert from/to MP3, MP4, MPC, OGG, APE, FLAC and WAV;
 * Support for LAME, FAAC, OGGENC, MPPENC, FLAC and MAC encoders;
 * Support for LAME, FAAD, OGGDEC, MPPDEC, FLAC and MAC decoders;
 * Rip audio CDs utilizing cdparanoia or cdda2wav;
 * Play audio CDs utilizing cdcd or Audio::CD or cdplay;
 * Support normalization with adjustable sensibility;

Installation:
OpenSuse 11.1 user can use "1-click" installer to install the package - here
Fedora user can install the rpm from here
Ubuntu user can install it from here
Others can download the source - here and install it using following command
tar zxvf gnormalize-version.tar.gz
cd gnormalize-version/
./install
After sucessfull installation, go to terminal and use command: gnormalize and you should see something like ..

Read more
Related Posts with Thumbnails